R on UCloud
Last updated on 2026-06-15 | Edit this page
Estimated time: 12 minutes
Overview
Questions
- What is UCloud?
- How do we use R and RStudio on UCloud?
Objectives
- Explain how to acces RStudio and R on UCloud
- Demonstrate how to setup drives and additional software working with UCloud
You need to run R on a computer that has more muscles than you own.
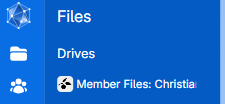
If you are a student at a Danish university, you are in luck, because you have access to a High Performance Computing (HPC) facility; UCloud. It can be acessed at cloud.sdu.dk using the normal UCPH login and password.
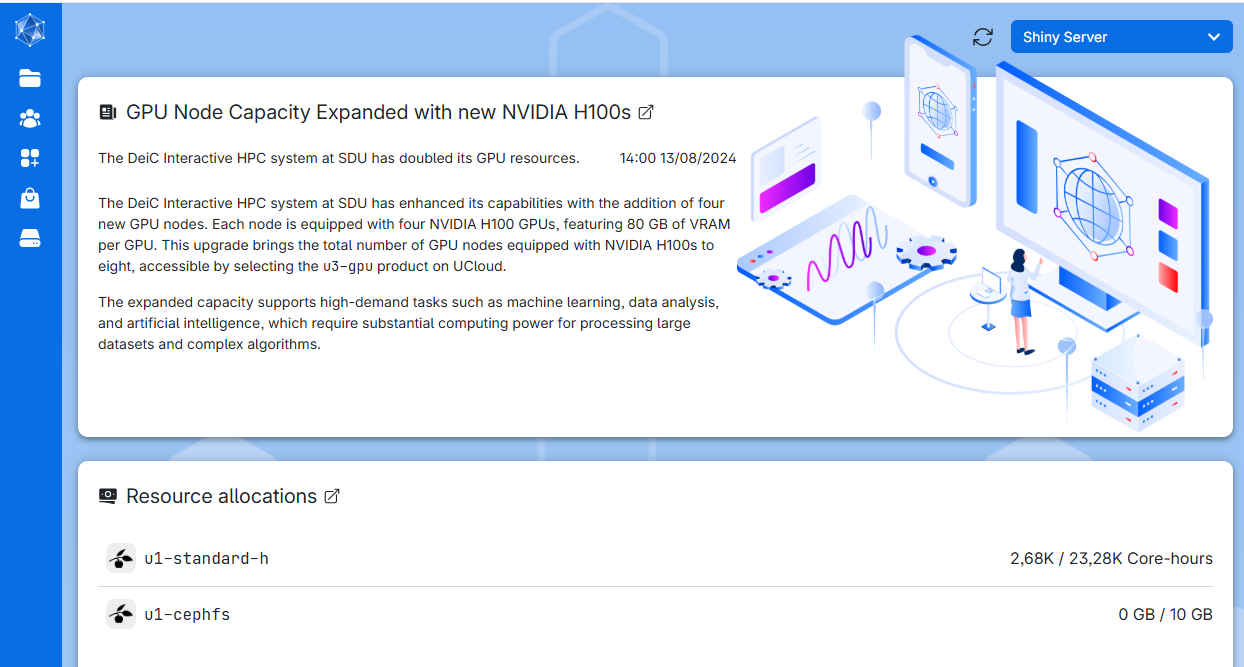
Depending on the user allowances, it will look something like this.
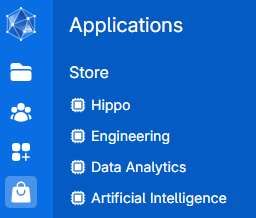
UCloud provides access to a multitude of different applications organized in the application store:
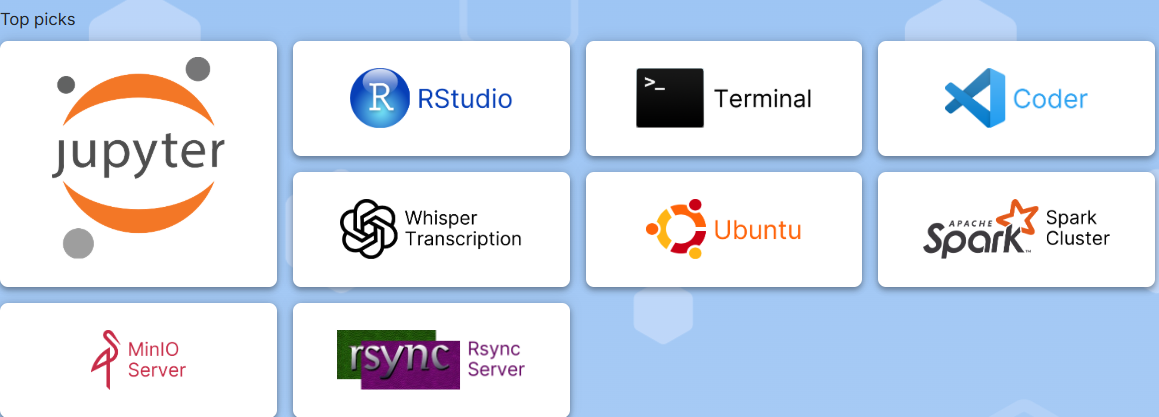
Amongst the more popular picks from the store is RStudio:
This allow us to start a session of RStudio, accessible in the browser.
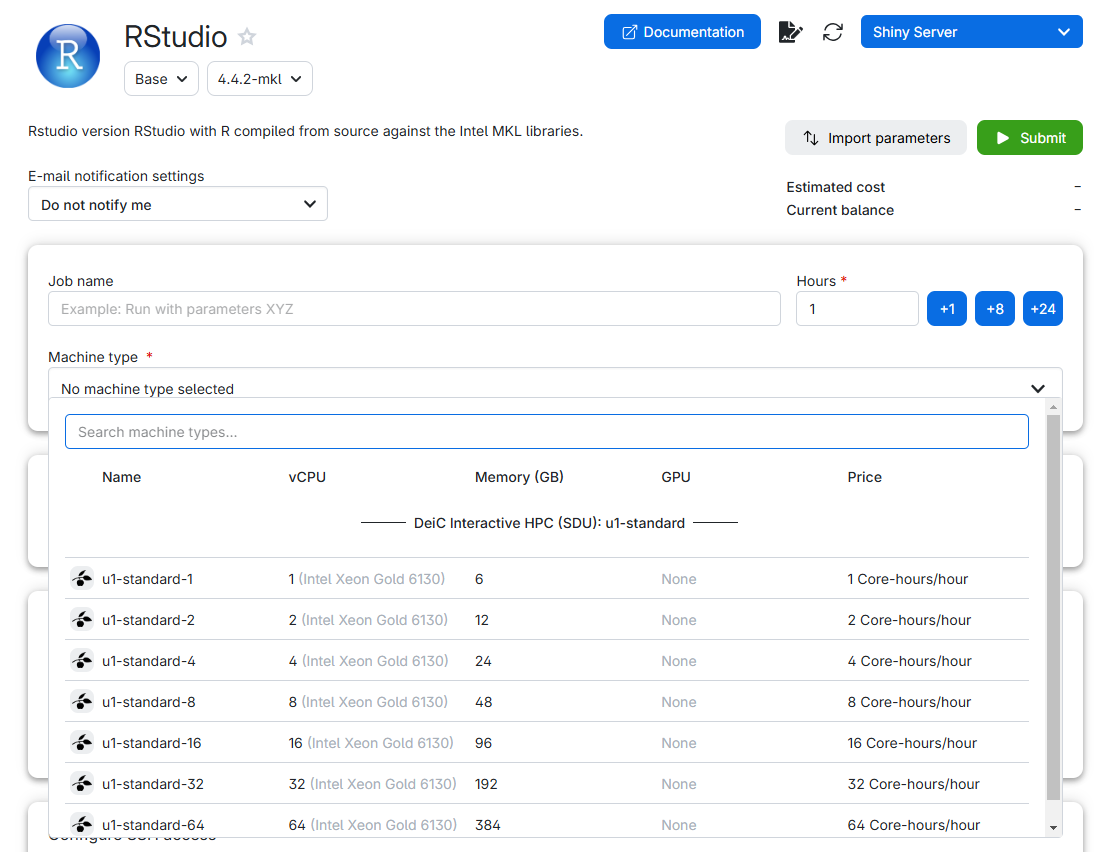
Note that we can chose different machine types. You select a suitable type of machine (with enough CPUs and RAM, more on this below), chose how long you want it to run, click submit, and after a short wait, you can click “Interface”, and you will have, in your browser, something that looks almost exactly like RStudio.
This is not a computer as such
What we can start is not a computer. It is a virtual machine. A virtual machine is not a real computer, it is a simulation of a computer that runs on a larger computer. Rather than installing an operating system and software on a real computer, we ask the larger computer to start a simulation of a computer. Since we interact with it through the web, we might not discover the difference. But there are some, which are important to know about.
Compute (CPUs)
Running a virtual computer on a HPC-facility gives us access to a lot of resources, primarily “CPUs” and “RAM”. Most modern CPUs have multiple “cores”, which are the units that do calculations. Roughly speaking, having 6 CPUs with 4 cores each would allow you to do 24 calculations at a time, rather than just one.
To do: hyperlink to the parallelization page for more on cores and parallellization:
For your code to make use of the fact that you have multiple cores, and get the speed benefits, you need to set it up do so. This is called parallellization. It is sometimes worthwhile, but not always. You can read our short guide on parallellization here.
Memory (RAM)
Looking at the interface, we see that we also get access to more memory, or RAM.
RAM is the short term memory of the computer. If we want to manipulate 10 Gb of data, we need to be able to have 10 Gb of data in the memory of the computer. And we probably need to have access to much more than 10 Gb, because R likes to use a lot of memory, and tends to make a copy of the data it manipulates.
We might therefore have to chose a certain size of virtual machine, not because we actually need 64 cores, but because we need the memory.
It will go away!
Because we are running a virtual computer, rather than a real computer, most of what we do will disappear when we restart the computer. In R we typically installs a number of libraries or packages. Those will vanish into thin air when the virtual machine is closed down. In a section below we will cover access to drives on which to a certain degree can help us. But if we do not take precautions, we will have to install R-packages every time we start up a new virtual machine on
Cost
We might be tempted to let the virtual machine run forever, instead of only for 1 hour. But is a limited resource, and we only have a specific allowance in total. Running a machine with one virutal CPU for one hour consumes 1 “core-hour” of our allowance. Running a machine with 64 virtual CPUs for one hour consumes 64 core-hours. And when we run out of allowance - the machine will close down.
It will also close down when the time we chose ran out.
Therefore, do not request more cores than you actually need.
On the other hand, do not request less than you need. If you chose 1 CPU, with 6 Gb RAM, and discover that you actually needed 12 Gb RAM - you will have to shut down the virtual machine, and start a larger.
And because we are not running on a real computer, everything will be lost.
Your drive
Not all is lost when you restart a virtual machine. UCloud provides you with a drive:
In it we find a listing of what is in our drive: 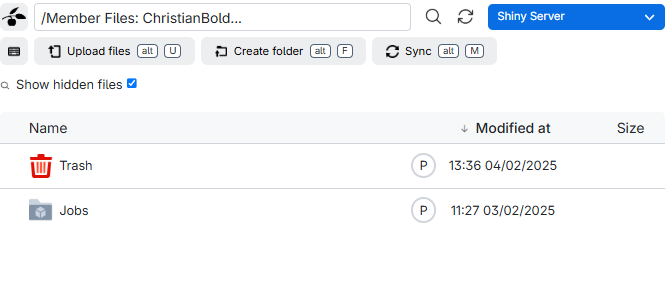
The folder “Jobs” contains data from the individual runs of virtual machines you have done. And Trash contains deleted files.
Note that the content of both these folders counts towards the total storage you have available - so consider deleting them regularly.
It is recommended to create a folder for your work. Choose “Create folder” and give it a name. For this example we will call it “ml-course”.
Do not use white spaces in your folder or file names. Most programming languages are able to handle them, but will almost always require special steps to be taken. Having white spaces in file names introduces a potential for problems that can be difficult to identify and fix.
Let’s get started with RStudio!
Go to the app-store as shown above, and chose RStudio.
Chose the “u1-standard-2” machinetype with 2 virtual CPUs and 12 GB memory.
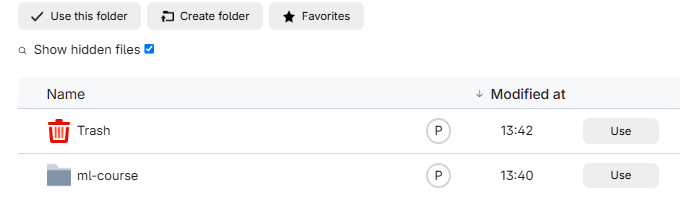
In order to be able to access our files, go to “Select folders to use” and click add folder:
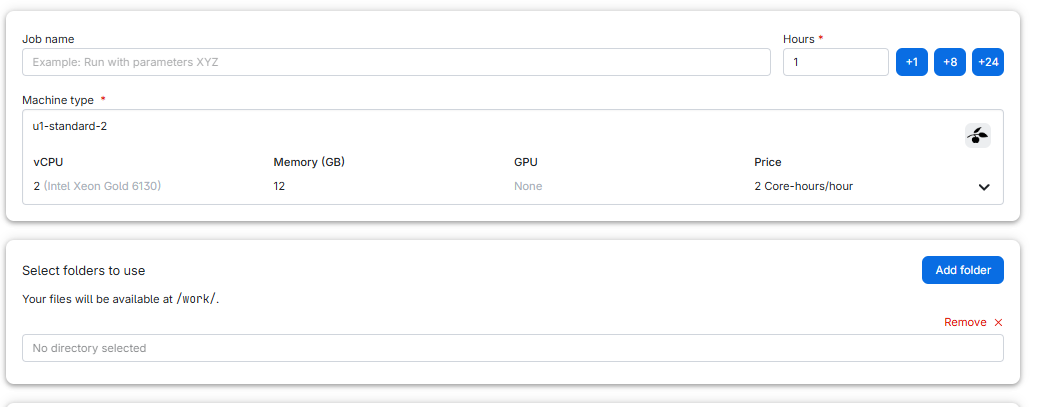
Click in “No directory selected” and then on “Use” to choose “ml-course”:
 And then click “Submit”
Your request is being processed:
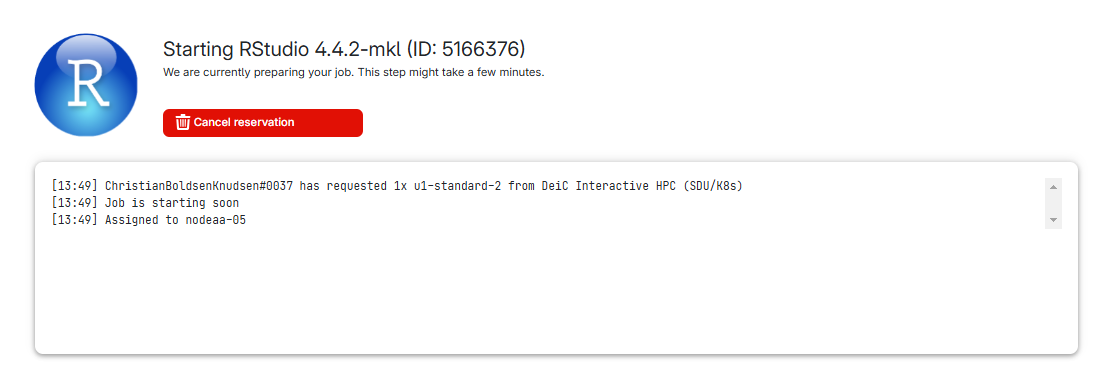
And after a short while, you get this:
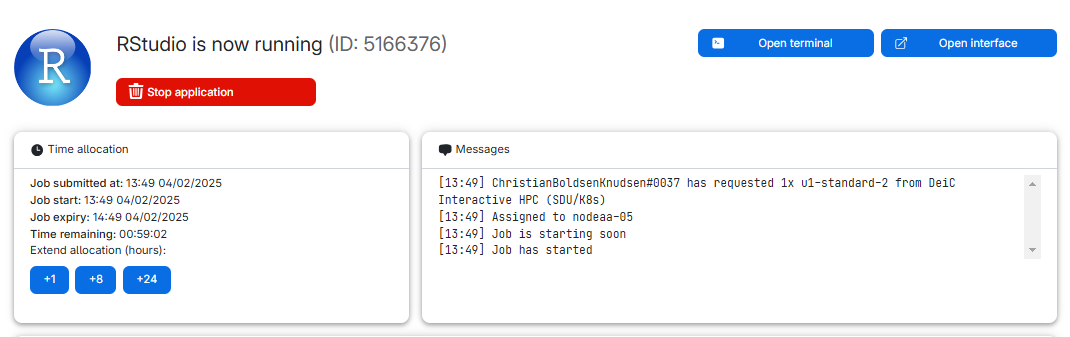
We can see what type of machine we chose, and how much time is remaining. We chose 1 hour, and we can extend the runtime by 1, 8 or 24 hours.
We can also see the “Open interface” button.
If we click that, RStudio opens and we can begin working with R.
Creating a project
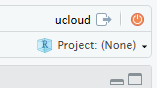
The very first thing we should always do, is to create a project. At the upper right hand corner we see where we can do that:
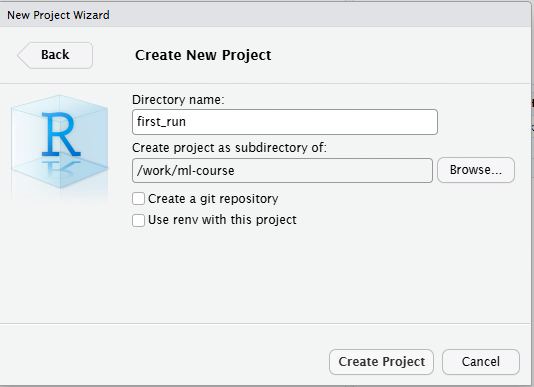
Click new project, create it in a “new Directory” and change the subdirectory in which the project is created to the directory we made earlier. THIS IS IMPORTANT!
We now have a project running in RStudio on a virtual machine on UCloud, and we are ready to work!
Housekeeping
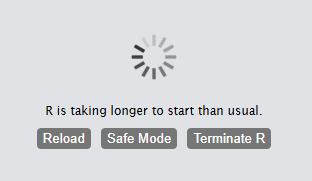
What to do if RStudio appears to freeze?
First of all - have patience. RStudio appears almost the same when it is frozen and if it is working on something that takes time. But take advantage of the fact that this is just a web interface to what is actually running on a virtual remote machine. Close the interface, and open it again. R will still be there.
Where can I find the job again?
Sometimes we close a window, or nagivate away from it. Where can we
find it again? In the navigation bar to the left in we find this icon.
 It provides us with a list or
running jobs (yes, we can have more than one). Click on the job, and we
get back to the job, where we can extend time or open the interface
again.
It provides us with a list or
running jobs (yes, we can have more than one). Click on the job, and we
get back to the job, where we can extend time or open the interface
again.
I’m done early - how do I stop the job?
If you are done with your work, and there is no reason to continue running the machine, you can stop it early. Find the job (see above), and click and hold the “Stop application” button. Remember to save your scripts in RStudio first!
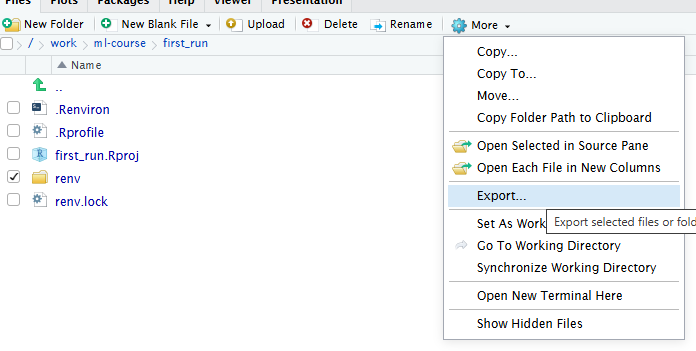
How do I get files out of UCloud?
This can be done in several different ways. provides guides on how to synchronise files. And there are archiving tools that can zip and download your files.
The easy way is to do it through RStudio. Select the folder and/or files you want to save, click on the little cogwheel saying “More” and chose “Export”. RStudio will now zip the files, and ask you where to save them.
To do: include how to use the UCloud archiving app to download an entire folder
How do I get files into UCloud
Again - has documentation that can help you. But the easiest way is to note that there is an “Upload” button in the Files pane in RStudio. Use that.
What types of machines do I have access to?
UCloud offers the possibility of “projects” where you choices might be different. If you’re not in a “project” these will be the default options:
| name | vcpu | memory (GB) |
|---|---|---|
| u1-standard-1 | 1 | 6 |
| u1-standard-2 | 2 | 12 |
| u1-standard-4 | 4 | 24 |
| u1-standard-8 | 8 | 48 |
| u1-standard-16 | 16 | 96 |
| u1-standard-32 | 32 | 192 |
| u1-standard-64 | 64 | 384 |
Setup issues
We can save our work, and as long as we do not delete it again, we have access to it. And keeping stuff in a project in R makes everything easy(ish) to locate.
That, in general works nicely on a “real” computer, where libraries and other elements of what we work with is saved locally.
On a virtual computer, locally is in the memory of a larger computer, and as hinted at, these locally stored files disappear when the virtual machine is restarted.
If you usually start your code with library(tidyverse),
you will, on a virtual machine, have to start with
install.packages("tidyverse") instead. Every
time!
R environments help you handle this. Think of them as bubbles in which you have all the right packages installed.
First of all, and make sure that when you start your Rstudio job, you attach the folder we demonstrated how to use earlier:
Secondly, and for the same reason, you must create a project in that same folder, the one you attached to the run of the virtual machine.
Then start the RStudio job and run the following code line-by-line. That is needed because some of the lines of code restart R. This is necessary for R to read-in new options and settings. And when R is restarted, it does not know where to continue. So you’ll have to feed it the lines one at a time.
R
# Set path to renv cache
writeLines('RENV_PATHS_CACHE = "renv/cache"', ".Renviron")
# restart R in order to set the environment variable
.rs.restartR()

# Initializing renv. You might be asked if you want to do it.
# You do (enter "y").
renv::init()

#install all the packages you need. For example:
renv::install("textdata", prompt = FALSE)
#You can add more packages to the environment later
#(see below)

# Storing information about installed packages
# You might be asked if you want to proceed. You do.
renv::snapshot()
Data analysis is not worth much, if we are not able to reproduce our results. A significant amount of work has therefore gone into providing infrastructure for exactly that. One issue is the question of which libraries are used for the analysis.
Enter renv. renv is a library that
establishes scaffolding for installing libraries in a specific location
in an R-project, making it self contained and easy to distribute.
Normally we would distribute a “lock file” that describes exactly which
versions of which packages are used in a project.
You will see a lot of stuff in the “files” tab. A folder called “renv”, a file “renv.lock”, and probably a file “.Rprofile”.
Looking into that, we will find a line of code “source(”renv/activate.R”)”
When ever we start the project, whatever we have written to .Rprofile will be run. What will be run in this case is the script “activate.R” which does a lot of interesting stuff. The important thing is, that the renv-library is started. And whenever we now install a package, it will be installed in the renv folder. Do not delve too deep into that, leave it to the machine.
One issue with this is, that there are still installed packages weird places on the machine. Caches of the packages are stored outside our project. The idea is that other projects might use these cached packages, and cut down on install time.
In our case, that is not helpful. This cache will disappear when the virtual machine is stopped.
In order to handle this, we can specify where the cache should be stored. We can do that manually. Or, and this is the preffered solution, make a file .Renviron where we specify where renv should place the cache. Having done that we need to restart R, and now we can install packages to our hearts delight, and renv will place both the libraries and the cache in our local project.
Do I have to do this every time?
Good news everyone! No.
If you start a new virtual machine, and add the same folder in you drive on Ucloud to the run, you can open your project again: Navigate to the project folder (you did remember the name, right?), and click on the .Rproj file with the same name as your project.
Due to the way Renv works, it might take some time to open the project:¨
What about other packages?
When you have run the setup above, and opened the project,
renv is running and keeping track of stuff.
That also means that if you need another package -
tidyverse comes to mind as a frequently used set of
packages, you simply install tidyverse running
install.packages("tidyverse") just as you would normally
do. These new packages are now installed in your project and will be
available without having to install them repeatedly.
But remember to run renv::snapshot() afterwards to
update the registration renv keeps of installed
packages.
Other issues
Renv is a bit finicky. You might get messages about packages being in “an inconsistent state”. Try running this first:
R
renv::restore()
And if that does not solve the problem, try:
R
renv::rehash()
renv::snapshot()
renv::restore()
Sometimes renv forgets that a library is installed…
Fortunately the libraries are easily available, so an
R
renv::install("rstudio/gtools")
is fast. The example shows gtools - exchange the package name for what is actually missing.
Setup when you need Python
In machine learning, many of the algorithms we work with require us
to have specific Python libraries installed and available to R. Typical
examples are Tensorflow and Keras, which we
need to create our own neural networks and fit them to data. Those
python libraries also disappear from the virtual machine, unless we keep
them in our R environment as well.
And to complicate matters even more, some of them require specific versions of Python, and are unable to run on the newest version. And by default the version of Python on Ucloud is the newest. So we also need to control which version of python is installed in our environment.
This solution is very similar to what we set up above: an R environment that we can work in again and again. However, it is a little more complex to set up an environment that also has Python packages installed and accessible to R (in jargon, it has to have another conda environment inside it). All this extra baggage also makes the environment slower to load, and a bit more prone to errors.
Therefore, we recommend setting up a separate R environment that is just for interfacing with Python, e.g. to do machine learning tasks. Start by launching an RStudio job and creating a new project. Give the project a Directory name that helps you remember this is your environment for using Python.
The following code set up Python. It should be run in addition to the code setting up your R-environment. That is, when setting up your Python evironment, first run the code above, and then the code below.
The following code will allow you to use Python packages in R and
sets up Tensorflow and Keras, two of the most
commonly used machine learning packages. Once again, you need to run it
line by line. Remember to first run the setup for R as shown above.:
R
# Yes, it should be possible to do this in one go.
# It fails. So, three lines of code. Again, run these
# line by line (important!) and select "y" if prompted:
renv::install("reticulate", prompt = FALSE)
renv::install('rstudio/tensorflow', prompt = FALSE)
renv::install("rstudio/keras", prompt = FALSE)

# Install miniconda - control where
reticulate::install_miniconda(path = "python_env")

# Storing information about installed packages
# You might be asked if you want to proceed. You do.
renv::snapshot()

# restart R
.rs.restartR()

library(reticulate)

# Locate the python installation you made
# In order to force reticulate to recognize it_
conda <- file.path(getwd(), "python_env", "bin", "conda")

# Create the environment:
reticulate::conda_create(
  envname  = "my_project_env",
  packages = c("python=3.10", "pip"),
  channels = "conda-forge",
  conda    = conda
)

# Set variables pointing to the environment just created
env <- file.path(getwd(), "python_env", "envs", "my_project_env")
envlib <- file.path(env, "lib")
Sys.setenv(LD_LIBRARY_PATH = paste(envlib, Sys.getenv("LD_LIBRARY_PATH"), sep=":"))

# Specify the environment to use:
reticulate::use_condaenv("my_project_env", conda = conda, required = TRUE)

# Install base python packages.
# Installation is pinned to specific versions.
# If other versions are needed, avoid ">="
reticulate::py_install(
  packages = c(
    "numpy==1.26.*",
    "pandas==2.1.*",
    "tensorflow==2.16.*",
    "keras==3.*"
  ),
  pip = TRUE
)

# If needed, install transformers and torch as well.
# Again avoid ">=", instead specify the exact version if you need another:
reticulate::py_install(
  packages = c(
    "transformers==4.30.*",
    "torch==2.2.*"
  ),
  pip = TRUE
)

# Save the environment:
renv::snapshot()
Det svære her er at få korrekte versioner. Og at få openssl installeret med den samme version som der kører på systemet.
Det betyder også, at hvis systemets python-version ændres - kan vi få fejlbeskeder om at ssl ikke kan findes.
You can access this R-with-python environment just like before, by opening the project in RStudio: Click on the .proj file. You can add other packages to it just like before. But for reasons we do not entirely understand at KUB Datalab (yet), you also have to run:
R
.rs.restartR()
conda <- file.path(getwd(), "python_env", "bin", "conda")
reticulate::use_condaenv("my_project_env", conda = conda, required = TRUE)
every time you open the project, before actually doing anything else.
One way to check that the whole set-up worked is to run the following script:
R
#restart R and pull up the conda environment

.rs.restartR()
conda <- file.path(getwd(), "python_env", "bin", "conda")
reticulate::use_condaenv("my_project_env", conda = conda, required = TRUE)

#try to access keras and create a neural net
library(keras3)

model <- keras_model_sequential() |>
  layer_dense(units = 32, input_shape = c(784)) |>
  layer_activation("relu") |>
  layer_dense(units = 10) |>
  layer_activation("softmax")

summary(model)
If you get a nice summary, everything worked. You might get messages about “ssl not installed”. Those can be ignored. And you will also get warnings about tensorflow not being compiled for working with “GPU”s. Since we do not have access to GPU on the kind of virtual machines we can run RStudio on, on UCloud, these can safely be ignored.
- UCloud provides access to a multitude of advanced software that we are not able to run locally
- Running RStudio on UCloud gives us access to more compute and memory than we have on our own computer
- Restarting a virtual machine means all our work and setup might be lost, unless we take certain precautions.
- More advanced work might require a quite complicated setup